OnBase V13 at Mary Baldwin
This is intended as a How-To Guide to OnBase at Mary Baldwin and will cover the following:
- Getting Started
- Logging into OnBase
- Retrieving Documents
- Launching the View Window
- Viewing Keywords
- Printing a Document
- Exporting a Document
- Indexing with Document Separation
- Modifying Your User Options
- Modifying Your Toolbar
- Update Documents with AutoFill Keyword Sets
- Adding an AutoFill Keyword Set
- Register Desktop Document Imaging License
- Returning Desktop Document Imaging Licenses to Previous User
Getting Started
Each document is labeled with values known as Keywords and is stored under the appropriate Document Type. Searching OnBase with Keyword values enables you to retrieve all digital documents (records) for a certain client. Combining Keyword values with Document Types allows you to retrieve specific documents for that client, for example a pay stub or birth certificate. Below are some common OnBase terms:
Document Group
Document Groups consist of different Document Types, which may all be in the same Document Group.
Document Type
The document category under which a document is classified in OnBase.
Keyword
A value associated with a document that enables retrieval of the document. For example Mary Baldwin ID and SSN are Keywords on every document in OnBase.
Document Retrieval
A feature in OnBase that allows you to search for documents by Document Type. Document Retrieval is a more specific search than Custom Query.
Document Search Result Window
The Document Search Results window lists all documents that match the search criteria you selected in the Document Retrieval window. The Document Search Results list stays open or minimized until OnBase is closed.
Logging into OnBase
OnBase is setup to Auto-Logon based on the user information logged into the workstation.
- Double-click the OnBase V13 shortcut located on your desktop.
Retrieving Documents
There are a variety of methods available for retrieving documents. The Document Retrieval dialog box is the most common method, as it allows you to search for documents based on Document Type Group, Document Type, Document Date, Keyword Values, and document contents such as text and note text.
Search criteria can be as Broad as displaying all documents stored in OnBase or as Narrow as a specific Document Type, on a specific date, and a Unique Keyword such as a SSN.
To perform a basic Document Retrieval search, follow these steps:
- Click the Retrieve Documents toolbar button or select File | Open | Retrieve Document.

- The Document Retrieval dialog box is displayed
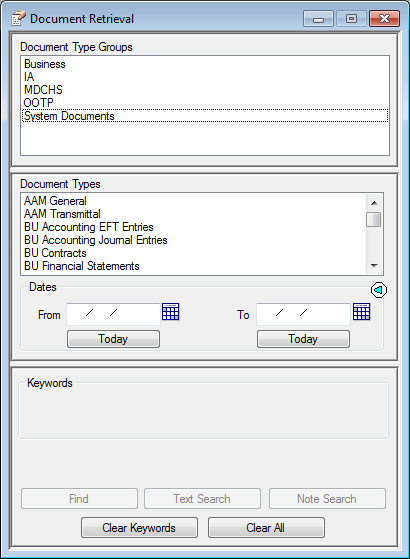
- Specify one or more of the following search criteria. Any combination of the below options can be used to retrieve documents:
- Document Types or Document Type Groups
- Document Date
- Keyword Values
- You can further define your search with comparative and logical operators.
- To Select all Document Types, double-click in the Document Type window.
- When more than one Document Type is selected, the list of Keyword Types displayed is limited to Common Keywords, which are the Keyword Types common to the selected Document Types.
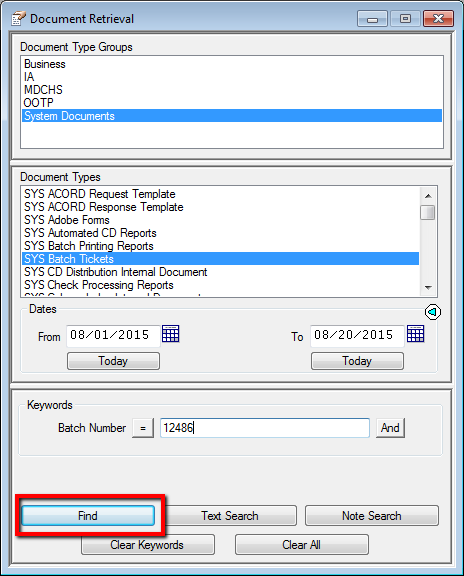
- Click Find.
- Documents that match your query is displayed in the Document Search Results.
- To View a document(s), double-click on the document you would like to open.
- From an open document, you can access a variety of options, such as e-mailing the document, viewing its Keyword Values, adding notes to it, etc. (based on your product rights and privileges).
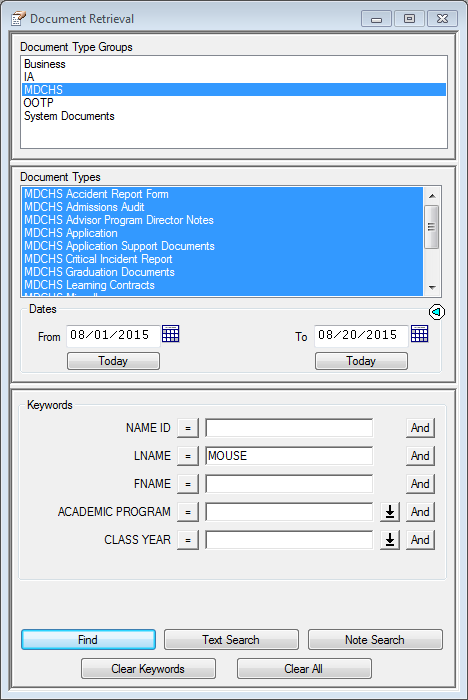
Document Search Example:
The search is looking for All Document Types in the MDCHS Document Type Group in the Date Range of 8.1.15-8.20.15 with the Last Name Mouse.
Viewing Cross Referenced Documents
A Cross Reference is a relationship between a Document Type and one or more other
Document Type(s). This allows you to double-click or select the document menu on a document and retrieve the related document(s).
- Perform a document search
- Open the specific document.
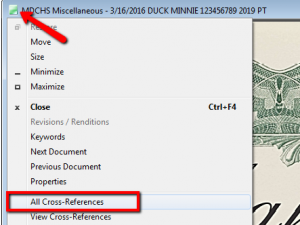
- Click the Document Menu button in the upper left hand corner.
- From the drop-down menu, select All Cross-References
- A list of all documents related to the current document will be pulled based on the cross-reference configuration.
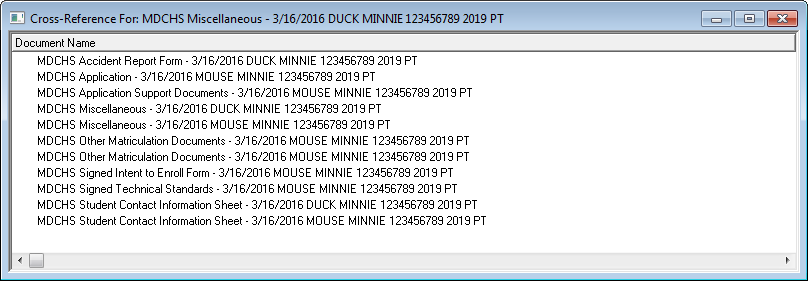
- Double-Click any of the documents to view them.
** See Modifying Your Toolbar to add Cross-Reference buttons to your toolbar. **
Viewing PDF Documents in Acrobat or Acrobat Reader
By default, PDF documents are displayed in the OnBase internal viewer. Using the internal viewer gives these documents access to full OnBase functionality (i.e., Notes, Cross References, etc.). To configure Acrobat or Acrobat Reader to display PDF documents within an instance of Acrobat or Acrobat Viewer instead of the internal viewer:
- Open Adobe Acrobat or Adobe Acrobat Reader.
- Click Edit | Preferences and select Internet from the Categories
- In the Web Browser Options section, de-select the Display PDF in browser check
- Click OK and exit Acrobat or Acrobat Reader.
- Re-launch the OnBase Client PDF documents are now displayed in an instance of Acrobat or Acrobat Viewer instead of the internal viewer.
Users will not have access to OnBase functionality from within Acrobat or Acrobat Reader.
Searching for Text
Use a Text Search to locate specific text within documents based on the Document Retrieval settings. The Text Search Results list displays after a search has been completed. The left side of the window displays your user name. The right side of the window displays the Job Number, Search String, and Status. To open the Text Search Result list, select User > Text Search Results from the Menu Bar.
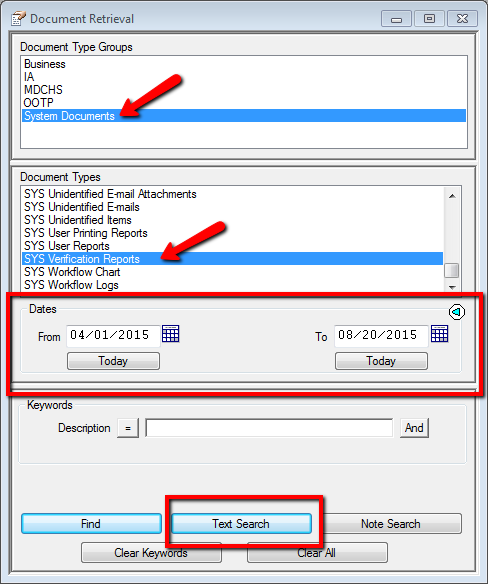
- Open the Document Retrieval dialogue box by clicking the Retrieve Documents toolbar button.
- Select the Document Type Group(s), Document Type(s), and Date Range you would like to search for a specific text.
Click Text Search
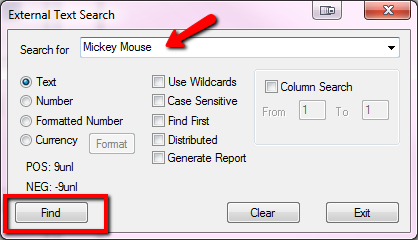
- The External Text Search dialogue box will appear. Enter your Search Text in the Search For field, check any other options that apply, and click Find
- OnBase will display a Progress Bar while the search is being preformed.
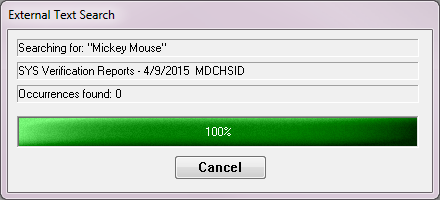
- When the Text Search is complete, the Text Search Result window will appear. If NO results are found, a No Documents Found dialog box will appear.
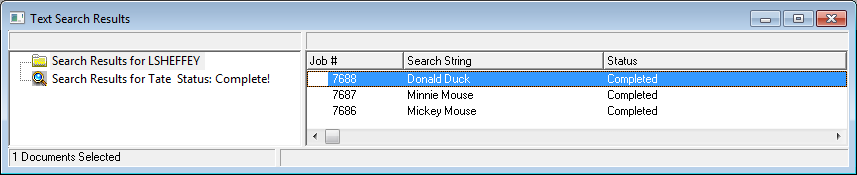
- Double-click on the job number or search string you want to view
- The Text Search Results list displays documents containing the search string as well as the number of times the search string occurs in each document
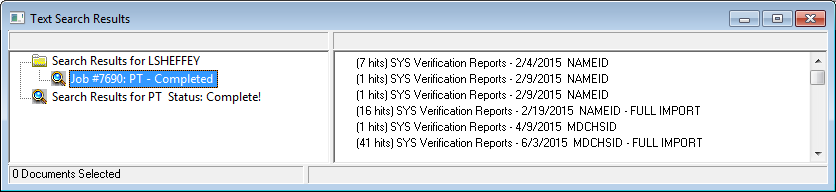
- Double-click a document from the list to display a list of all occurrences of the search string in the document.
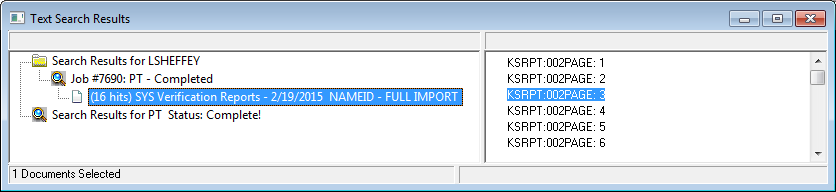
- Double-click an occurrence of the search The document opens with the selected occurrence of the search string highlighted.

Launching the Viewer Window
When retrieving documents from the Document Search Results dialog box, you may preview the files through the Viewer Window. The Viewer Window has a split screen that is comprised of a search results list and a viewer window, allowing you to view the document before opening it.
To launch the viewer:
- From the left-hand side of the Document Search Results dialog box, right-click on your
- Select Launch Viewer.
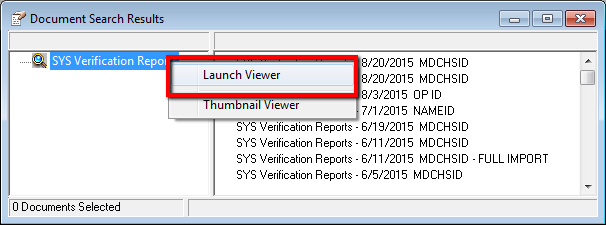
- The Viewer Window is displayed
Viewing Keywords
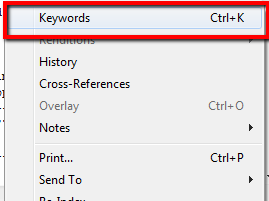
Some documents have one or more Keyword Type Values displayed automatically when you open the document. These Keyword Types are configured by your system administrator to Auto-Display. To open the Add / Modify Keywords dialog box and access a document’s Keyword Values, perform one of the following functions:
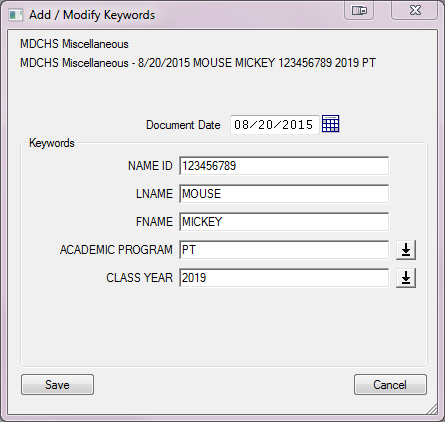
- Right-click on the open document, or the document’s status bar, and select Keywords.
- The Add/Modify Keywords dialog box displays. From the Add/Modify Keywords dialog box, you can view or edit Keyword Values, depending on your OnBase Rights.
Printing Documents
Access to printing is spread throughout the system. When documents are selected for printing, the Print dialog box appears.
- Select the File | Print option from an open document or from a Document Search Results List or Right-click and select Print.
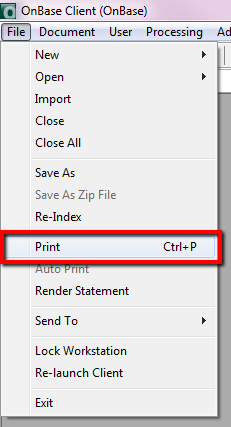
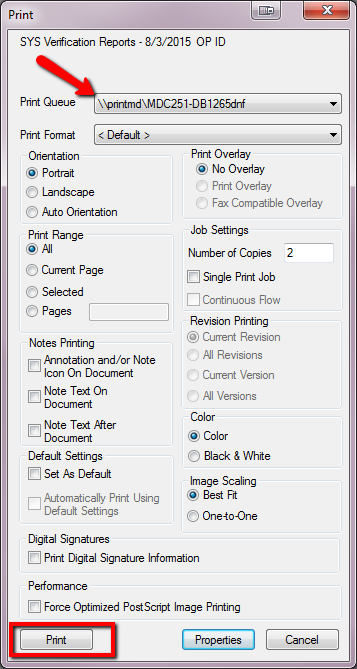
- The Print dialog box opens
- Select a Print Queue (Printer) from the drop-down
- The Print dialog box gives you options to select the orientation, print range, number of copies, etc.
- Once you have selected your Print Options click Print
* The Properties button, will open the select printers properties box.
Printing Multiple Documents
If you select multiple documents to print, you should also select <Use Doc Type Default> from the Print Format drop-down select list. This selection will print each document based on the document types print format.
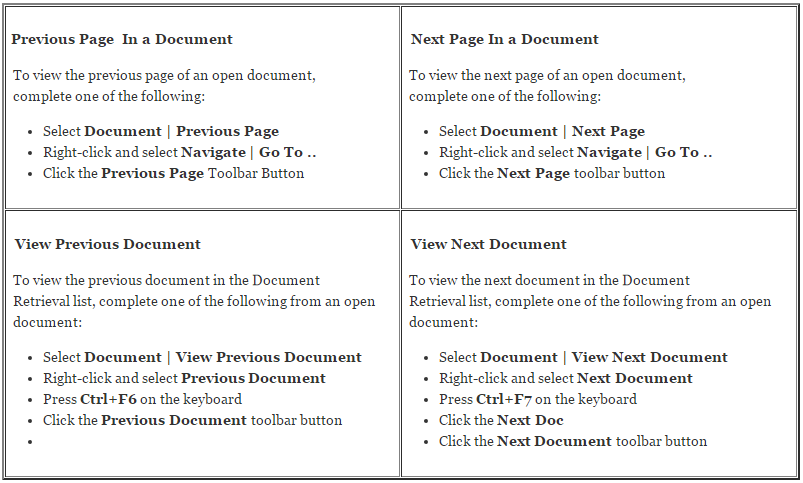
Navigating Documents in the OnBase Client Module
The system provides a variety of ways to navigate options. Depending on the option you need and the way you prefer to work, you can navigate using toolbar buttons, right-click menus, and the keyboard.
- Use the toolbar buttons, the Document menu and right-click menu options to navigate documents (Go To Page, Zoom In, Next Page, )
- In text based documents, use the keyboard Page Down and Page Up keys or the arrow keys to scroll vertically or Use the scroll bar to scroll vertically or horizontally.
Exporting Documents
If you have sufficient privileges, you can save open documents to a location outside of OnBase using any of the following methods:
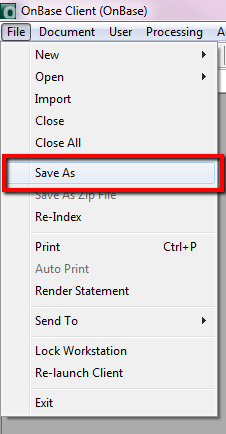
- From an open document, select File | Save As or right-click and select Send To | File.
 or
or 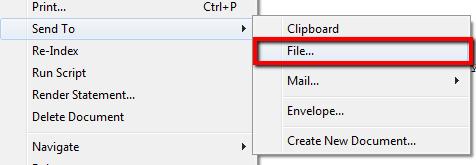
- Select Options and click Save.
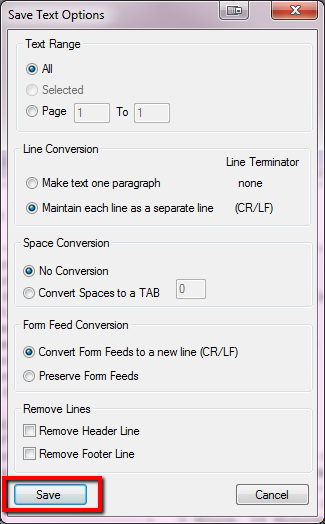
- The Windows Save As dialog box is displayed, select the location you wish to save the document, give it a name click Save.
** If you use any of these methods from an open image or text document that contains notes, the Advanced Options window is displayed.
Indexing with Document Separation
From the Multi-Function Printer
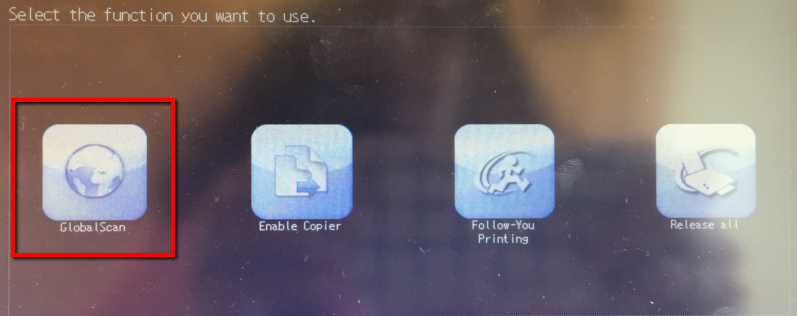
- Log into RICOH Printer
- Select Global Scan
(Files can also be scanned to a USB drive)
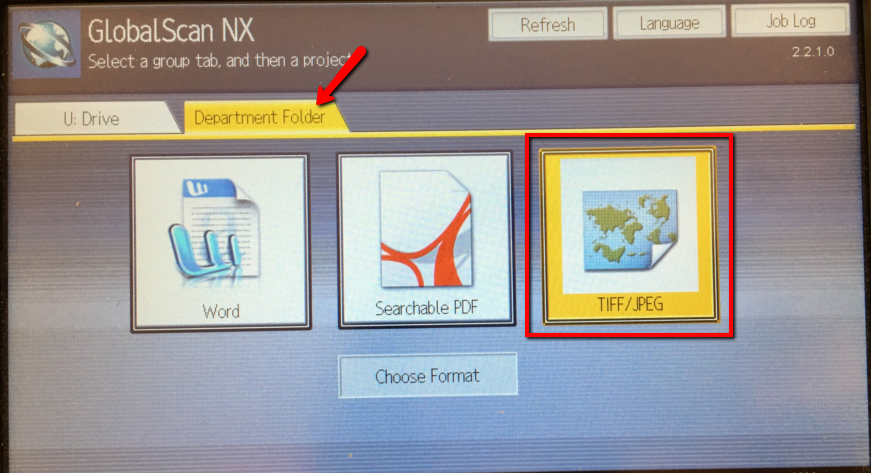
- Select the Department Folder and scan document as .TIFF file.
- Rename document to Student ID

- If your documents are double sided, you may need to change the Scan Settings.
- Press Start on the key pad/
- Repeat for each student file.
*** Refer to Mary Baldwin documentation for further instruction on using the Multi-Function Printer: https://go.marybaldwin.edu/oit/copying-from-the-mfp/
From OnBase Client
- Log into OnBase
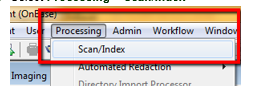
- Select Processing > Scan/Index
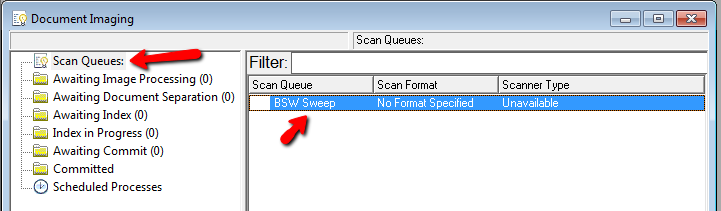
- Select Scan Queue in the Left-Hand column and Double-Click your Scan Queue in the Right-Hand Window.
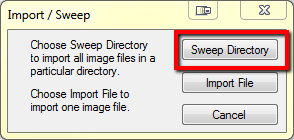
- Right-Click in the blank area > Select Sweep Directory
- Double-Check the Sweep Directory to make sure it is for your department, click OK. Double-Check the Sweep Directory to make sure it is for your department, click OK
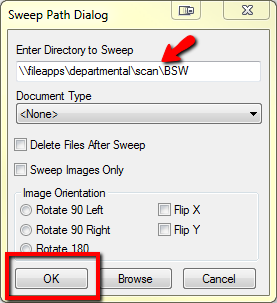
- Click OK
Awaiting Document Separation
- Click Awaiting Document Separation
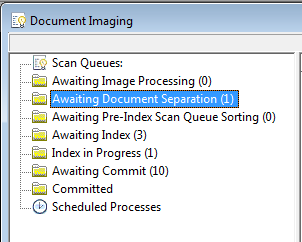
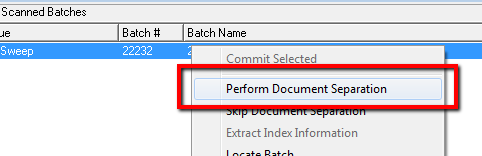
- Select a Batch, right-click the batch and click Perform Document Separation
- Highlight the page where a new document needs to be created or separated in the batch. Press Enter or click the Break/Unbreak Button for a new document.
(Each line in the document separation window, defines a new document.)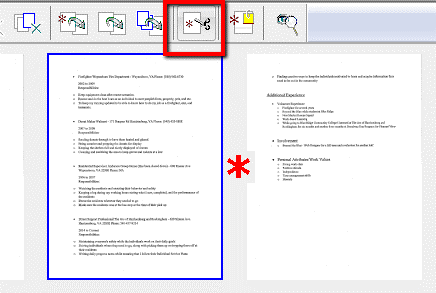
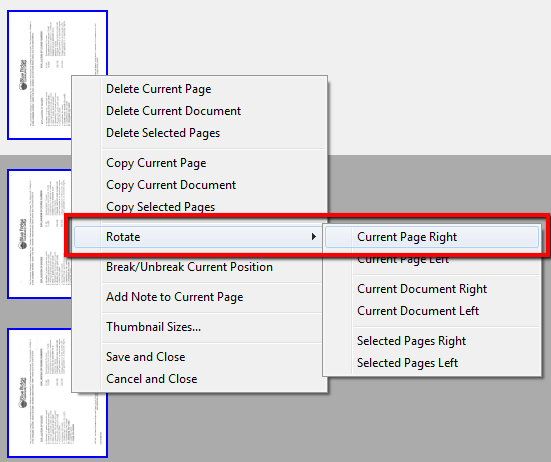
- If pages need to be rotated, select the page, right-click page, select Rotate > Current Page.
Repeat each for each page in the Batch.
(Hold the Shift key and click each document to select multiple documents, use Selected Pages L/R)
- When complete, click Save and Close, Yes to Confirmation box.

- Click Yes to move your batch to next processing queue
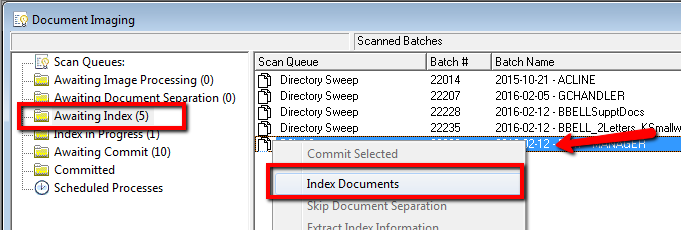
Awaiting Index Queue
- Click Awaiting Index
- Highlight your batch, right-click, Index Documents
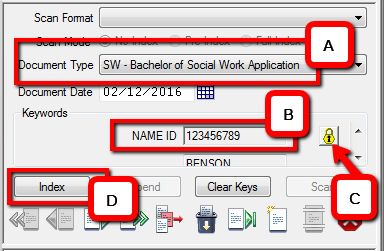
- To Index each document, select:
- Document Type
- Enter the Student ID and press Tab
- Select the ‘Lock’ to keep keywords for the batch
- Click Index
- The next document will be displayed, select the new Document Type and press Index to view the next document.
- When the batch is completely indexed, it will be moved to Awaiting Commit
Awaiting Commit
- Select Awaiting Commit, Right-Click your batch, click Commit Selected.
(To select multiple batches click the first batch, hold the Shift key + click the last batch.)

- Click to OK to the Commit box.
Modifying Your User Options
Through the User Options dialog box, you can customize the appearance and system functionality for each user. Since these settings are assigned per user, they remain in effect at any workstation. To access the User Options dialog box, Select the User | User Options menu.
You can save user-specific settings in each of the following tabs:
- General Tab: define OnBase Client module display preferences and general behavior.
- Startup Tab: control the appearance and display of certain Client module features at
- Document Tab: define the characteristics or defaults of the documents retrieved in the Client
- Workflow Tab – works in conjunction with the Workflow If you are not licensed for the Workflow module, you may not see this tab or this window may not list any workflows
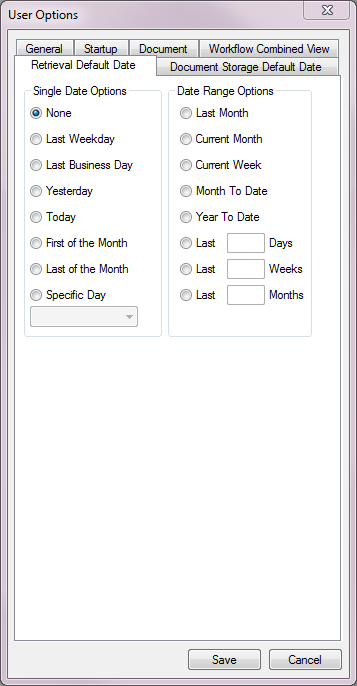
- Retrieval Default Date Tab: This tab allows you to set either a single date or a date range to be used by the system as default for retrieving documents using the Document Retrieval and Custom Queries dialog boxes. Setting the default date saves time when you frequently search for documents using a specific date or date range.
- Document Storage Default Date Tab: set the Document Default date for Client module processes such as COLD, DIP, TIP, Scan, etc.
Modifying Your Toolbar
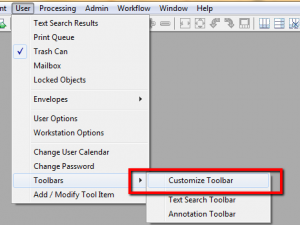
- Once in OnBase Client, select User > Toolbars > Customize Toolbar
- Select the buttons you would like to add to your toolbar from the Available Toolbar Buttons and click Add.
In this example, the View Cross-References & Run All Cross-References buttons have been added.
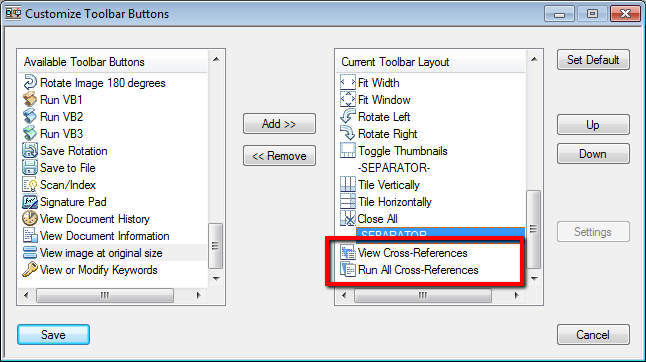
- Once you have updated your toolbar, click Save.
Update Documents with AutoFill Keyword Sets
This process is used to update documents with updated keywords based on the AutoFill Keyword Set associated with the document. This process should be ran at the end of the day. Depending on the amount of documents being updated, it could take several hours.
- Log into OnBase Client
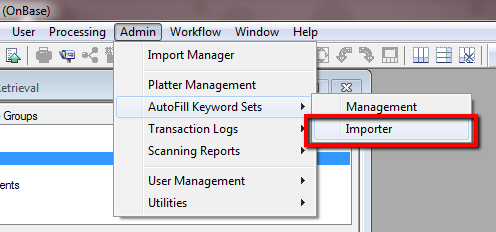
- Select Admin > AutoFill Keyword Sets > Importer
- Highlight AutoFill Keyword Import Formats
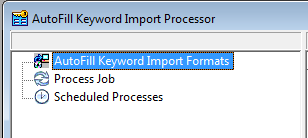
- Under Process Formats, select the process that needs to be updated.
- Rick-Click and Select Execute Import Process
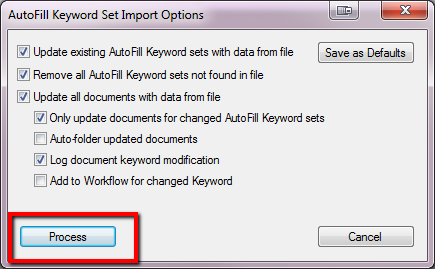
- In the AutoFill Keyword Set Import Options Select:
- For Update existing AutoFill Keyword Sets with data from file
- Remove all AutoFill Keywords sets not found in file
- Update all documents with data from file
- Only update documents for changed Autofill Keyword Sets
- Log document keyword modifications
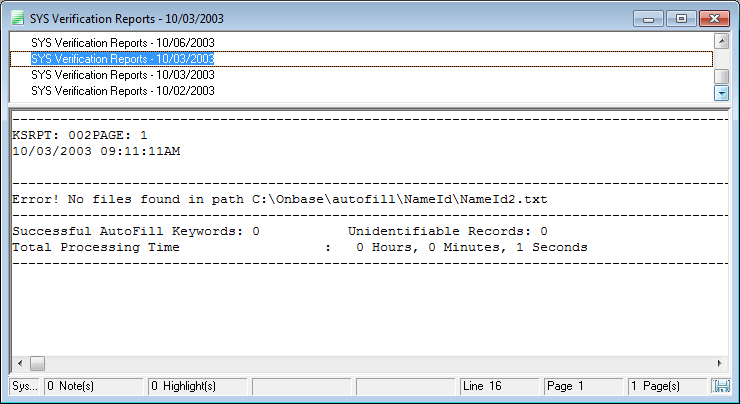
- Click Process
- The SYS Verification Report will open when the import is complete showing the options selects, the updates, and Successful AutoFill Keywords.
Adding an AutoFill Keyword Set
If a student record is not listed in the autofill keywords, you have two option:
- Send a Help Desk Ticket to update the file.
- Enter the student information from the OnBase Client
Below are instruction to on how to add the Student Information Manually.
- Log into OnBase Client
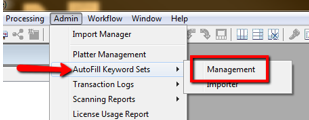
- Select Admin > AutoFill Keyword Sets > Management
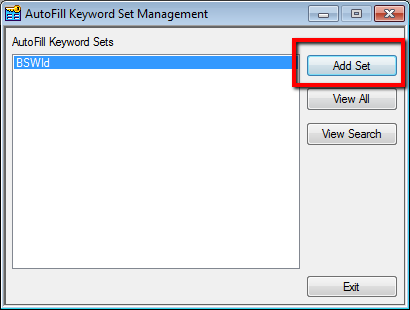
- Select you departmental AutoFill Keyword Sets and click Add Set.
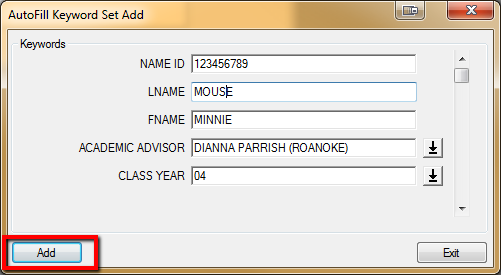
- Enter the Student information into the AutoFill Keyword Set Add box and click Add.
(Repeat as needed)
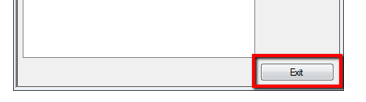
- Click Exit when complete.
Register Desktop Document Imaging License
Mary Baldwin has 2 Shared Document Imaging licenses for the Institution:
- Desktop Document Imaging (15 ppm max)
- Desktop Document Imaging (Unlimited)
If both Desktop Document Imaging Licenses have last login date of the current day, place a Help Desk Ticket for a license, include your computer name.
An OIT Member will contact you once there is a Desktop Document Imaging Licenses registered to your computer.
- Open and Login to the OnBase Client
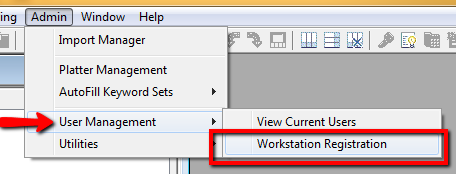
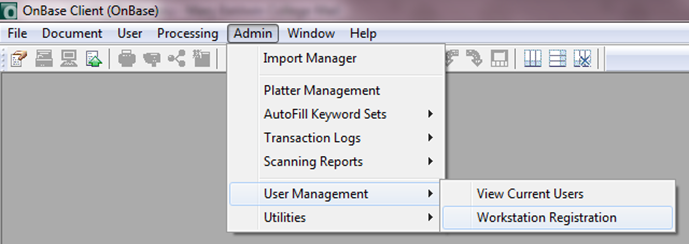
- Select Admin > User Management > Workstation Registration
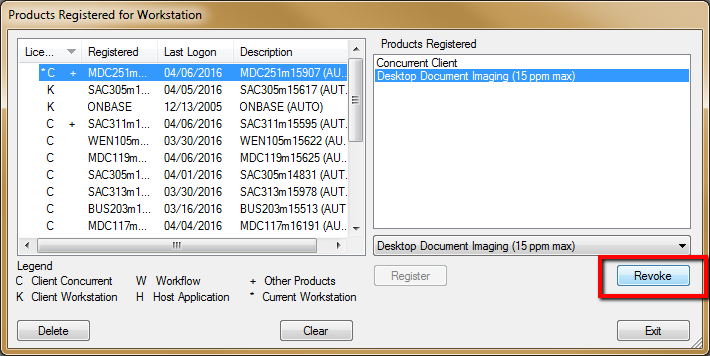
- Overview of Products Registration Workstation Window
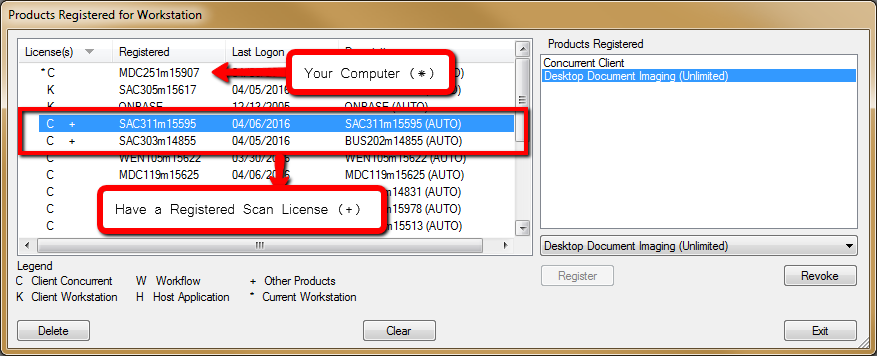
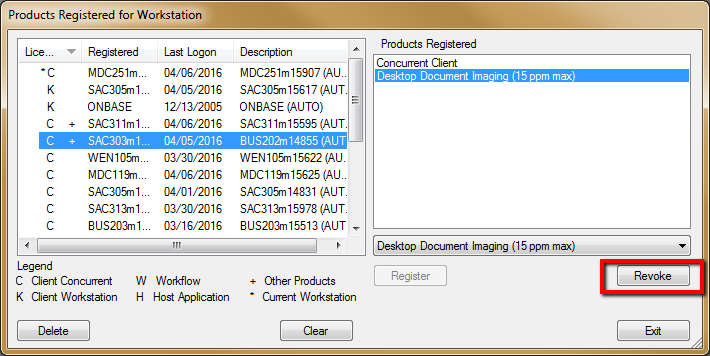
- If both Licenses are in use, highlight the Registered Workstation that has the oldest Last Logon date > select Desktop Document Imaging (*******) under Products Registered and click Revoke.
*Remember the computer you revoke the license from so that you can re-register it to that computer when you have completed your sweeps.
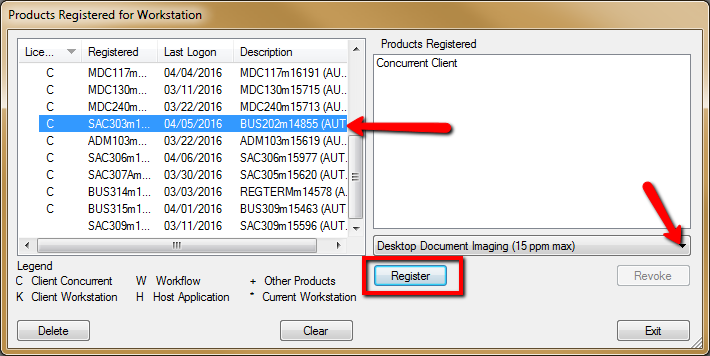
- Highlight your computer name, select Desktop Document Imaging (*****) from the drop-down menu under the Products Registered window > click Register
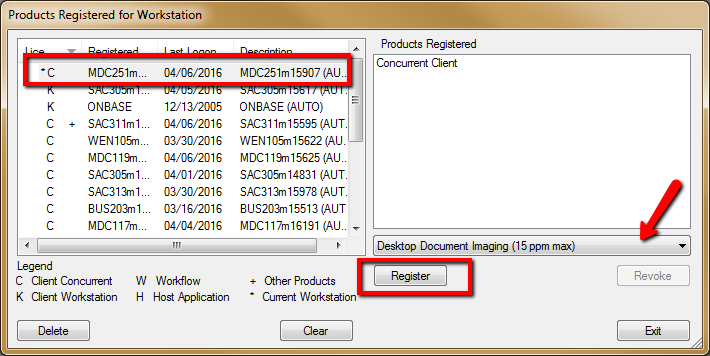
- You will now have the licenses, click Exit
Returning Desktop Document Imaging Licenses to Previous User
- Select Admin > User Management > Workstation Registration
- Highlight Your Computer Name > select Desktop Document Imaging (****) > click Revoke
- Highlight the previous owner of the License > select the drop-down menu under the Products Registered window > select Desktop Document Imaging (15 ppm max) > click Register
- You have given back the licenses to the previous user, click Exit