Viewing and Annotating a Panopto lecture
Live Note Taking During a Lecture (no delay – useful for insteat students)
Annotating a Lecture Being Broadcast (40 second delay- not useful for inseat students)
Viewing Options – multiple screens
Search notes within all your Panopto Lectures and Folders
Silverlight Plugin (NPAPI Plugins) in Chrome
Viewing and Annotating a Panopto lecture:
Panopto recordings can be used in two ways. If your professor has pre-recorded a lecture, or is recording the lecture but is NOT webcasting, you can access the lecture LATER for review, note-taking and subsequent review. If your professor is recording AND webcasting, you can note-take the lecture while session is being recorded and then subsequently review, continue to note-take, and review again. There is no limit on the number of times you can review a lecture. To access your Panopto lecture and take notes on it:
- Click on the Panopto link in your Mary Baldwin Blackboard course OR Go to http://marybaldwincollege.hosted.panopto.com/
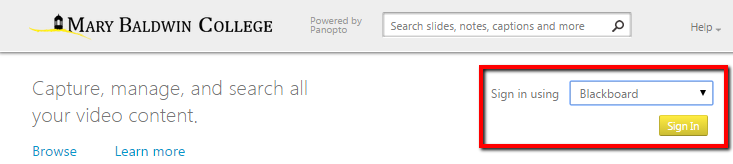
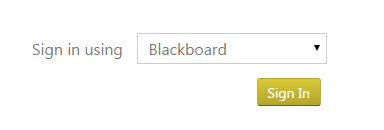
- Choose Sign In Using Blackboard and click on the green Sign In button.
- Click on Mary Baldwin University at the upper left to see the Panopto home page.
- Click on the Folder that has your course’s lectures in it.
- Find the lecture you wish to view and click on it to start viewing the lecture.
- The first time you are viewing a lecture in Panopto, you may need to install Microsoft Silverlight. Follow the prompts and install it using the default settings. This will take a few minutes.
- If your lecturer has used two screens during the lecture, and is not annotating on the screens with mouse, laser pointer or pen, you will want to click on the Slides view (at the bottom right of the playback screen) so you can view slides from both screens. In Slide view, the main playback screen will display whichever Powerpoint slide the professor has clicked on last. The screen that is being displayed has a green bar on the top of it in the timeline at the bottom of the screen
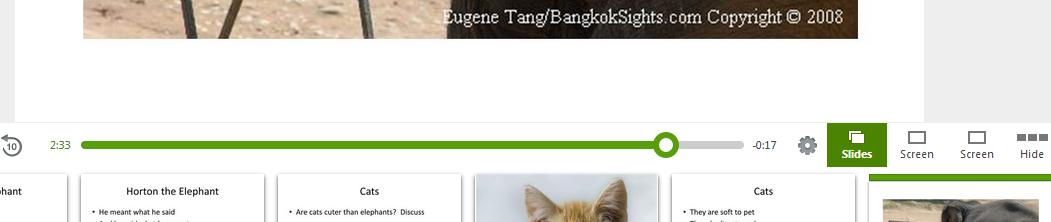
- If the timeline disappears and you need to see it again, click on Show:

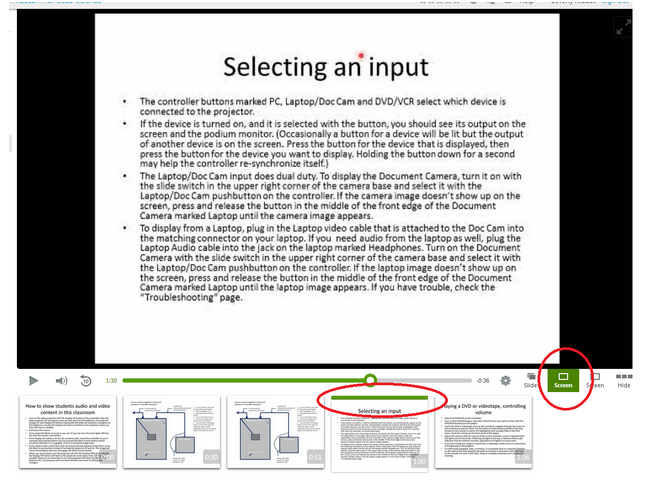
- If your lecturer is only using one screen, and they are annotating on that screen, you will want to view the lecture in Screen view.
- If your lecturer is using two screens AND annotating, follow the instructions here:
- Click on Notes and add Notes about what you are hearing in the lecture. You will be able to search for the text of the notes you have taken, to help you find that topic again.
- Tip – if you choose a special word and always use it in your Notes (for example, TST for things you think are likely to be on the test) it will be easier to find those things later.
How to take Live Notes during a lecture.
The Take Note option will add notes to your lecture at real-time with NO Delay. Follow the below steps to take Live Notes:
- Sign in to Panopto using your Blackboard credentials.
(When you click Sign In, a Blackboard screen will open for you to enter your credentials.)
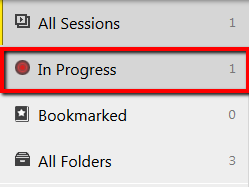
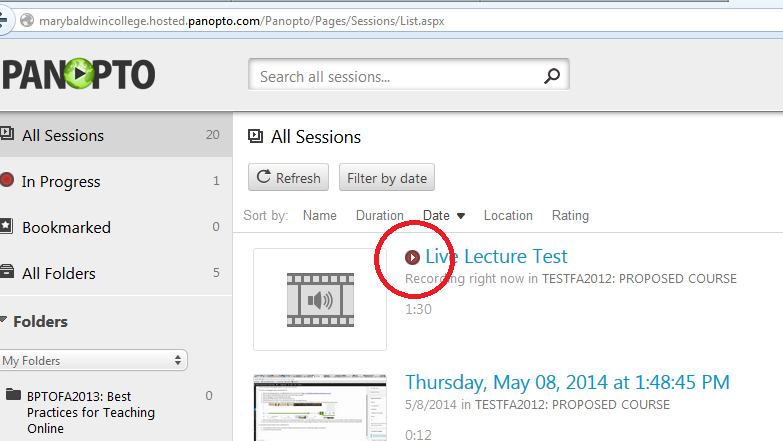
- Find the session that is currently being recorded by clicking In Progress in the left-hand column.
- Hover over the session that you wish to take notes for and the Takes Notes option will appear below the session name, click Take Notes
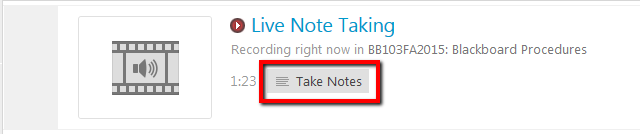
- A new window will pop up (Live Note Taking) where you can begin to take notes.
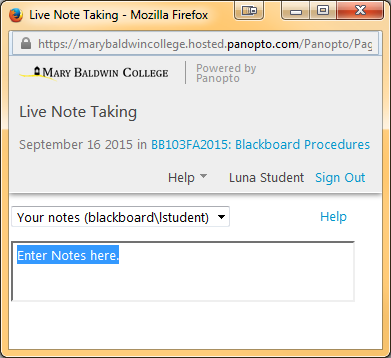
- All notes you take will be time stamped and aligned with the recorded session for later use. The second you begin to type is the second that will be time stamped in the viewer.
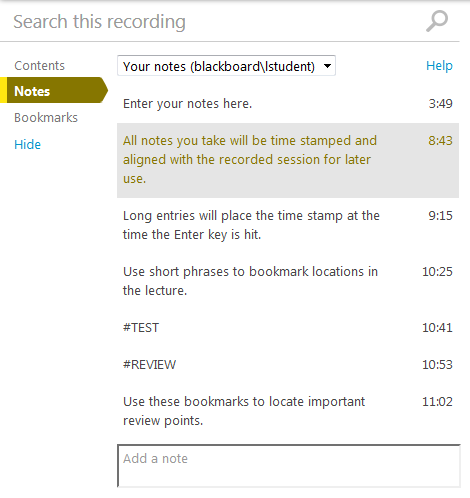
- Once the lecture is over and you have completed your notes for the class, Sign Out of the Live Note Taking window.
Instructional video on How-To Take Notes in Panopto can be found here (1:34)
Panopto’s own documentation about Taking Notes is here.
To annotate a lecture while it is being broadcast:
Annotating Lectures through the shared Webcast link during class will have a 40 Second Delay to note placement and the video stream.
- Your professor will have to have chosen to Webcast and Record the session, rather than simply recording it.
- Locate the live lecture by logging into the course in Panopto through Blackboard as detailed above. It is likely to be at the top of the Course Folder and it will have a little red triangle next to it. Click on it.
- Mute your audio! The webcast will be several seconds behind the live lecture. By the time you type in your notes and press enter, the notes will be attached to approximately where you would want to begin listening when you are reviewing.
- Click on Notes and start typing. In order to make your notes sync up with the lecture closely, do not type in more than a sentence without pressing the Enter key.
Viewing Options
If your professor is using a Laser Pointer or annotating with a pen on a presentation, you will need to view the video in Screen View in order to see the Pointer. Click on the screen that is marked with the green bar in the timeline, to see where the pointer is on that screen. You will know you are on the correct screen if the image in the large viewing screen matches the image with the green bar over it in the Timeline below. As the professor moves from slide to slide during the presentation, you will need to click on the other screen to see the pointer or pen on that screen.
Panopto’s own documentation about Viewing is here.
Downloading Audio Podcasts
The Panopto product allows you to download the audio portion of your recorded lectures, for off-line reviewing. Thanks to Kathie Yang who helped us test this functionality!
This might be handy if you have your laptop but are not on the network, or if you want to download to your iPod or other mobile device and listen to lectures while exercising or travelling.
To download these audio files, when you are in your Course folder, click on the orange Subscribe button at the upper right of your screen and choose iTunes or RSS.
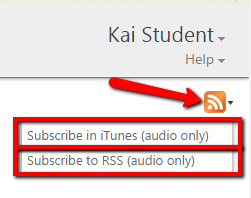
If you choose iTunes, the audio portion of these broadcasts will be available through iTunes on your laptop or mobile device.
To play the broadcast from your laptop, double click on the little circle to the left of the lecture you wish to hear in order to play it.

To play the broadcast from your mobile device, you will need IOS7 and the Podcasts App. Click on Podcasts, then the folder for your Course, then the lecture you wish to hear.
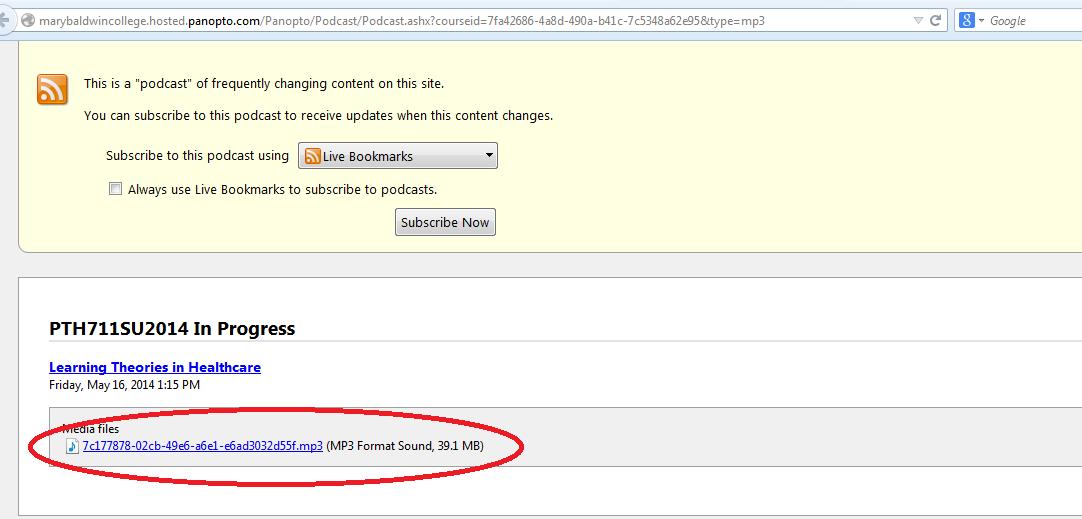
If you choose RSS feed, the .mp3 (audio file) of the lecture will be available to you to play on your laptop or to download. To play, click on the filename. To download, right click on the lecture and choose Save Link As to choose where to download the .mp3 file.
NOTE: This might not work so well in Chrome, so try another browser if you have difficulty. An Add-On or App can be found in the Google Web Store if you would like to use chrome.
Download the Panopto Recorder
To use the drop box for one of your courses, you will need to download the Panopto Recorder using the following steps:
- Log into the Mary Baldwin University Panopto Site with your Blackboard Username and Password
- Select Blackboard for Sing in using and click Sign In
- You will be redirected to a Blackboard Login Screen.
- Enter your user information and click Login
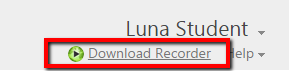
- In the right-hand corner click the Download Recorder Icon
- Depending on the operating system you computer has (OS X for MAC or Windows for PC), click on the Download Installer icon.
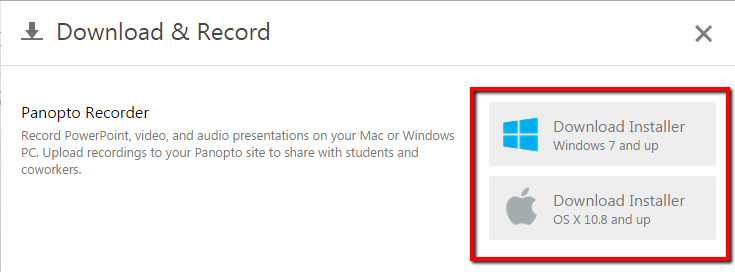
- A panoptorecorder file will download to your computer. Locate the file (usually in your download folder) and run the installer.

- When the installer is complete, a Panopto shortcut will be added to your desktop.

Using the Drop Box
To use the Drop Box, make sure you have the Panopto Recorder installed on your PC. If you have an Apple phone, you can install an app that will allow you to record to the Drop Box from your phone.
See Download the Panopto Recorder for instructions.
- Open the Panopto Recorder
- Login with your Blackboard Credentials
- Check the below settings and click Record

- When you are done recording, Click Stop .
- Once you have clicked Stop, Click the Recording Status Tab
- Wait until your Recording has finished processing before shutting your computer down.
(Your recording will be under Uploaded Recordings and there will be now processing Status.)

- Once your recording is complete you can share, edit, or view it.
Check the following settings once you have logged into the recorder:
- If you have access to more than one Drop Box, make sure you are in the correct folder.
- Click the larger are to the right of the folder to select a different course.

- Click Add New Session to select folder.
- Click the larger are to the right of the folder to select a different course.
- Give you Recording a session name under Record a new session called:
- Make sure you can see and hear yourself in the primary source. If not, select a different video or audio source from the drop down.
- Under Secondary Capture Sources, check the boxes that apply.
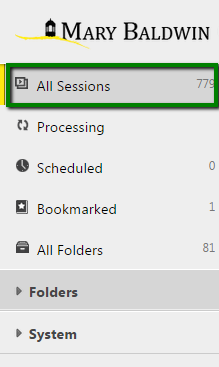
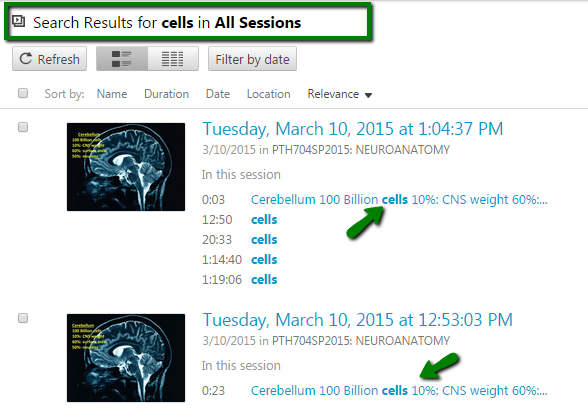
Search notes within all your Panopto Lectures and Folders
With Panopto, users are able to search all of the notes and bookmarks placed in any of the lectures they have access to.
- Log into the Mary Baldwin Panopto site with your Blackboard credentials.
- Select All Sessions in the navigation bar on the left of your screen.
- Enter the text you are looking for in the Search all sessions… input box and press enter.

- The search results for the text you entered will be displayed for All Sessions you have access to.
Silverlight Plugin (NPAPI Plugins) in Chrome
Google Chrome has officially stopped supporting Silverlight and all NPAPI plugins as of version 45.0.2454.85. See release notes here.
The only feature this will effect is Panopto’s standard editor. All other features will work via Google Chrome.
To access content that relies on Silverlight, please use one of the below browsers:
Additionally, Microsoft’s Edge browser does not support Silverlight.